
Getting Started
One TypeScript file. Three interfaces. No boilerplate.
Photon turns a .photon.ts file into a CLI tool, a web dashboard, and an MCP server for AI agents. You write methods. Photon handles the rest.
Install
bun add -g @portel/photonOr run it without a global install:
bunx @portel/photon --help

# pnpm alternative
pnpm dlx @portel/photon --help
Requires Node.js 20+. Bun is the preferred package manager; pnpm
dlxis also supported for one-off runs. TypeScript is compiled internally — notsconfig.jsonneeded.
Where things live
Photon keeps a tight, predictable layout. Knowing it up front saves a lot of confusion later.
| Location | What lives there |
|---|---|
./*.photon.ts (anywhere) | Your photon source. Run photon from this directory and it picks up every .photon.ts file alongside. |
~/.photon/ | Global photons. Anything dropped here is auto-discovered by the daemon, regardless of cwd. Created by photon new --global. |
~/.photon/state/<photon>/<instance>-settings.json | Persisted user settings (the runtime values that win over your in-source defaults). |
~/.photon/.data/ | Daemon-wide runtime data: log, socket, base directory registry, compile cache. |
<project>/.data/<photon>/ | Per-photon state, memory, scheduled jobs. Lives next to your source file when you run from a project dir. |
The full layout, including marketplaces and caches, is documented in How Photon Works.
The three-command path
If you just want an MCP server connected to Claude Desktop, these three commands are all you need:
photon new my-tool                  # Scaffolds ./my-tool.photon.ts in the current directory
photon mcp install my-tool          # Registers it in Claude Desktop's config
# Restart Claude Desktop. Your tool is live.
photon new is a shortcut for photon maker new. The scaffold lives in your current directory so you can open it in your editor, commit it to git, or share it with teammates like any other source file. Use --global if you'd rather drop it into ~/.photon/ for the daemon to auto-discover.
The rest of this page is about writing a photon from scratch so you can see how the same TypeScript class becomes three different interfaces.
Your First Photon (from scratch)
Create a file called todo.photon.ts in any directory:
// todo.photon.ts
export default class Todo {
  private items: { task: string; done: boolean }[] = [];

  /**
   * Add a task to the list
   */
  add(params: { task: string }) {
    this.items.push({ task: params.task, done: false });
    return this.items;
  }

  /**
   * List all tasks
   * @format table
   */
  list() {
    return this.items;
  }
}
That's 18 lines. Now run it three ways:
Web UI (Beam)
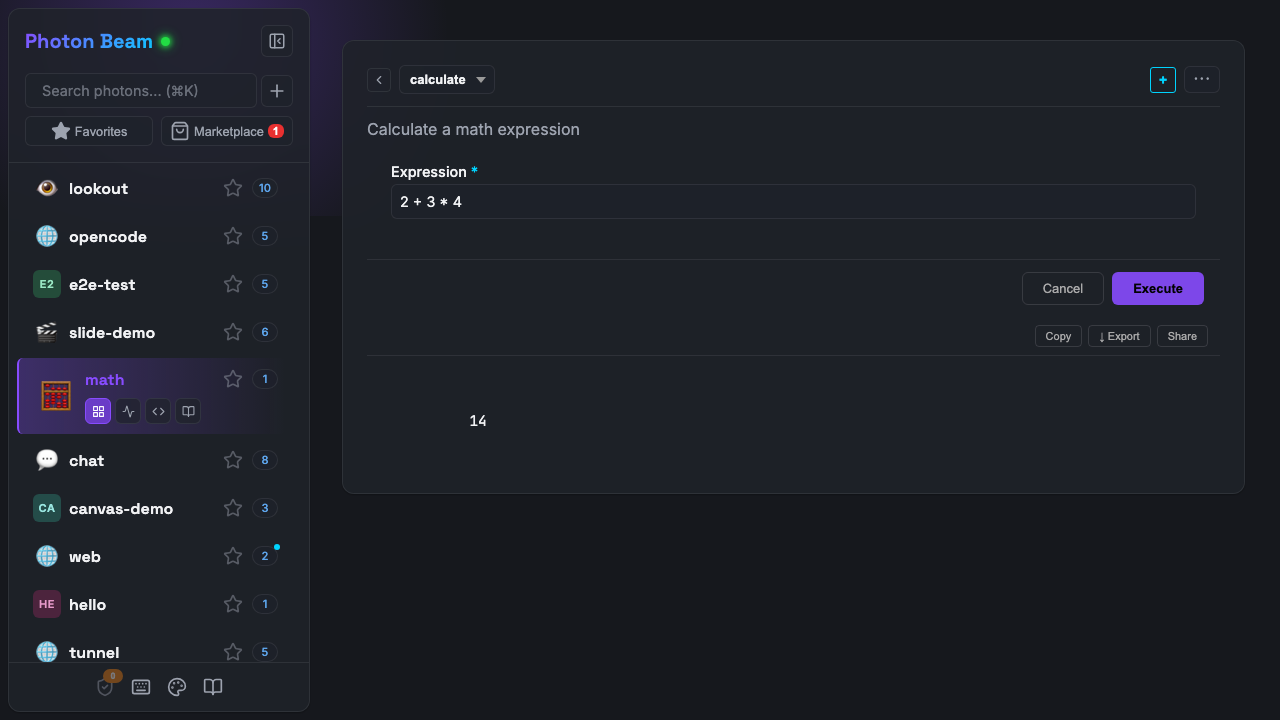
photonOpen the browser. Your todo photon appears in the sidebar. Click add, type a task, hit execute. Click list to see a formatted table.
CLI
photon cli todo add --task "Buy milk"
photon cli todo list
Same logic, terminal output. The @format table tag renders as an ASCII table in the CLI.
MCP Server (for AI)
photon mcp todoPaste the connection config into Claude Desktop, Cursor, or any MCP-compatible client. The AI sees your methods as tools, with descriptions from your JSDoc comments.
Make It Visual
Photon auto-renders return values based on their shape. Add @format tags to control how:
/**
 * Task completion stats
 * @format chart:pie
 */
stats() {
  const done = this.items.filter(i => i.done).length;
  const pending = this.items.length - done;
  return [
    { status: "Done", count: done },
    { status: "Pending", count: pending },
  ];
}
The same data renders as a pie chart in Beam, structured JSON for the AI, and a text table in the CLI.
Other formats you can try right now:
| Tag | What it does |
|---|---|
@format table | Sortable table with expandable rows |
@format chart:bar | Bar chart |
@format metric | Big number with label and trend |
@format ring | Circular progress indicator |
@format markdown | Rendered markdown |
@format mermaid | Mermaid diagrams |
See the full catalog in the Output Formats guide.
Add Persistence
Right now, restarting the server loses all data. Add @stateful to persist automatically:
/**
 * A persistent todo list
 * @stateful
 */
export default class Todo {
  private items: { task: string; done: boolean }[] = [];

  // ... same methods as before
}
That's it. The items array is now saved to disk after every method call and restored on startup. No database, no config — just a tag.
Add Comments, Get Superpowers
JSDoc comments aren't just documentation — they drive the AI's understanding, the CLI's help text, and the web form's labels and validation:
/**
 * Add a task to the list
 * @param task What needs to be done {@example Buy groceries}
 */
add(params: { task: string }) {
  // ...
}
Now:
- Beam shows "What needs to be done" as the field label, with "Buy groceries" as placeholder
- CLI shows it in
--helpoutput - AI reads it to understand when and how to call the tool
The more you express in comments and types, the more all three surfaces derive. One annotation, three consumers.
What's Next?
You've built a working photon with persistence and visual output. Here's where to go from here:
| Want to... | Read |
|---|---|
| Understand the mental model | Core Concepts |
| See all visual formats | Output Formats |
| Build custom HTML interfaces | Custom UI Guide |
| Add environment variables and config | Complete Guide: Constructor Configuration |
| Add OAuth authentication | Authentication Guide |
| Deploy to production | Deployment Guide |
| Connect to other MCP servers | MCP Dependencies |
| Browse everything | Complete Developer Guide |